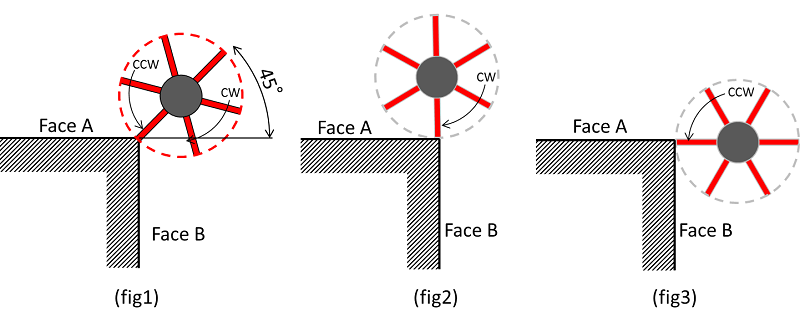
From the top view, the best approach is to place a center of a brush at the center angle to the edge. (Figure 1)
Burrs on Face A and B can be both removed.
Edge quality becomes stable if a brush is rotated in both clockwise and counter-clockwise directions.
Brush position on the Figure 2 is effective for burrs on Face A in the same way as figure 3 for burrs on Face B.
In case the depth of cut is excessive, the Brush may break off.
Please follow the machining parameters.
| Product code | Cutting speed (m/min) |
Rotational speed (min⁻¹) |
Feed per bundle (mm/bundle) |
Depth of cut (mm) |
Feed (mm/min) |
| W-A11-50 | 250 | 1600 | 0.5 | 0.2 | 4800 |
| W-A11-75 | 250 | 1000 | 0.5 | 0.2 | 3000 |
*As bristles are worn out, bristle length becomes shorter and increases stiffness, causing bristles to be broken.
If bristles breakage occurs, decrease the depth of cut.
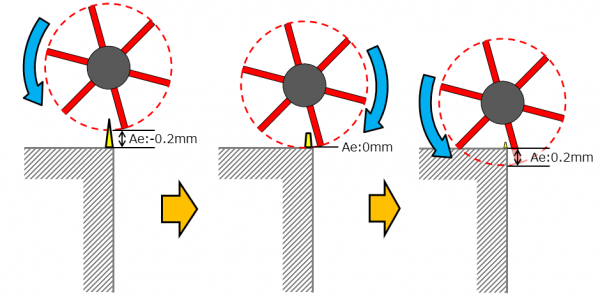
Use multiple passes as described below.
Gradually move the brush closer to the bottom of burrs. Increase the depth of cut step by step.
If trying to remove burrs in just 1 pass, it may cause excessive tool wear, tool breakage or burr may not be removed. Calculate the maximum height of burrs before using the tool.
The tool can be used for both dry and wet (oil-based and water-soluble) machining.
Wet machining may improve surface finish quality and tool life.
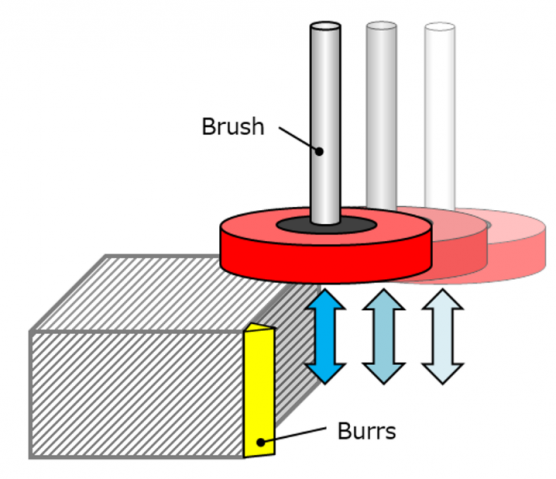
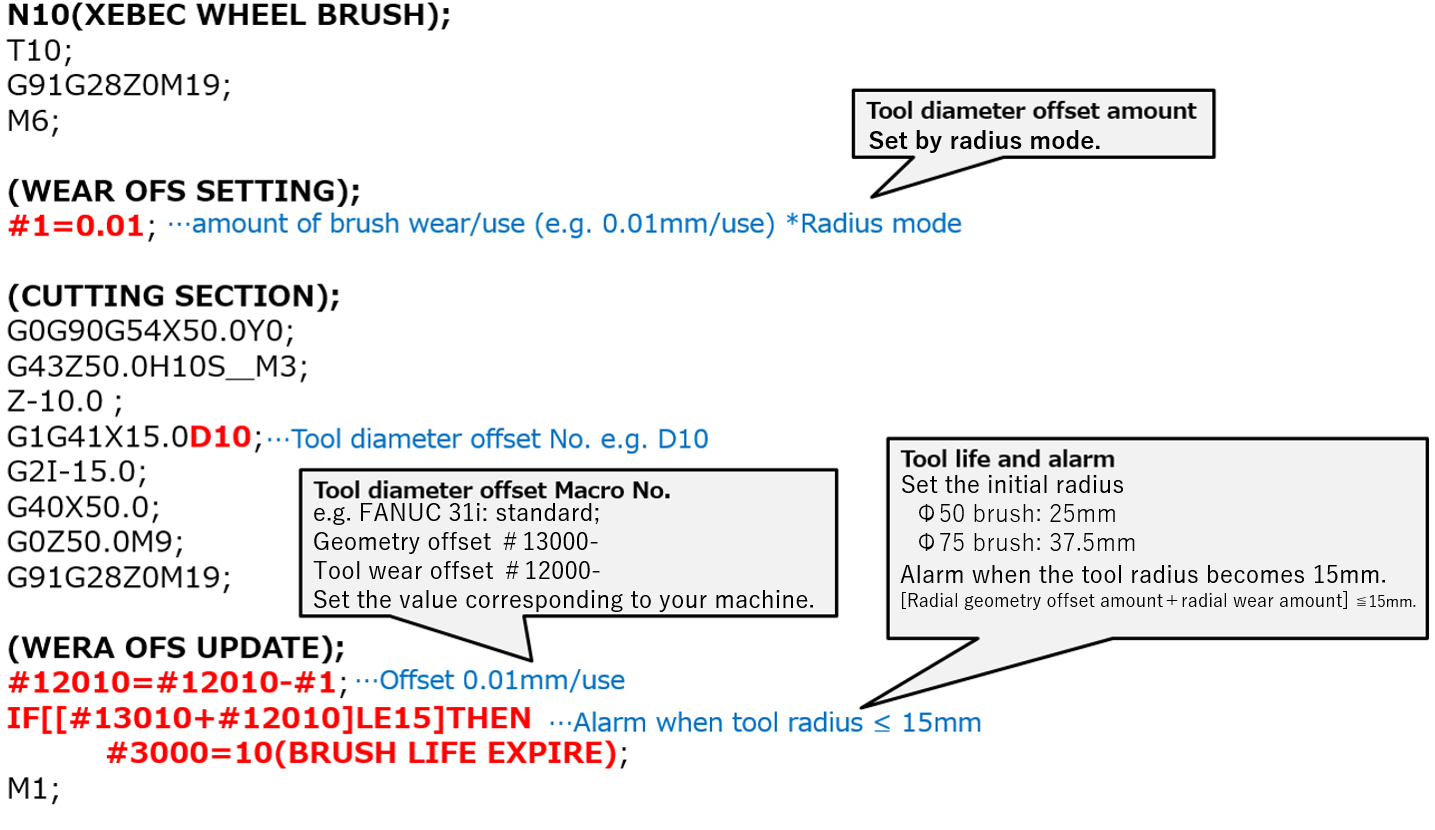
To use the XEBEC Brush Wheel Type, the depth of cut must be kept small. It is necessary to offset the wear amount in a radial direction.
Use a macro program or manually offset the wear amount. Refer to the example below.
Ideal for deburring and polishing inner diameters, side walls, and thread outside diameters