
XEBEC Technology is a tool manufacturer that develops and offers abrasive stones made of ceramic fibers.
The polishing process is a part of the production at most of the factories,
and it is to improve the accuracy of the workpieces and make the workpieces shiny by the mirror finish.
There are many methods of polishing available, and the difference from grinding is not very clear.
This article gives you a wide range of explanation of polishing such as the polishing methods,
types of abrasive stones to use, and the reason why polishing is required after grinding workpieces.
Index
・1. What is polishing?
・2. Polishing methods
・3. Steps in polishing process
・4. Differences between polishing and other processes
・5. Three components of abrasive stone
・6. Five factors that affect the performance of abrasive stones
・7. Importance of polishing the workpiece after grinding
・8. Importance of deburring and chamfering in polishing
・9. Conclusion
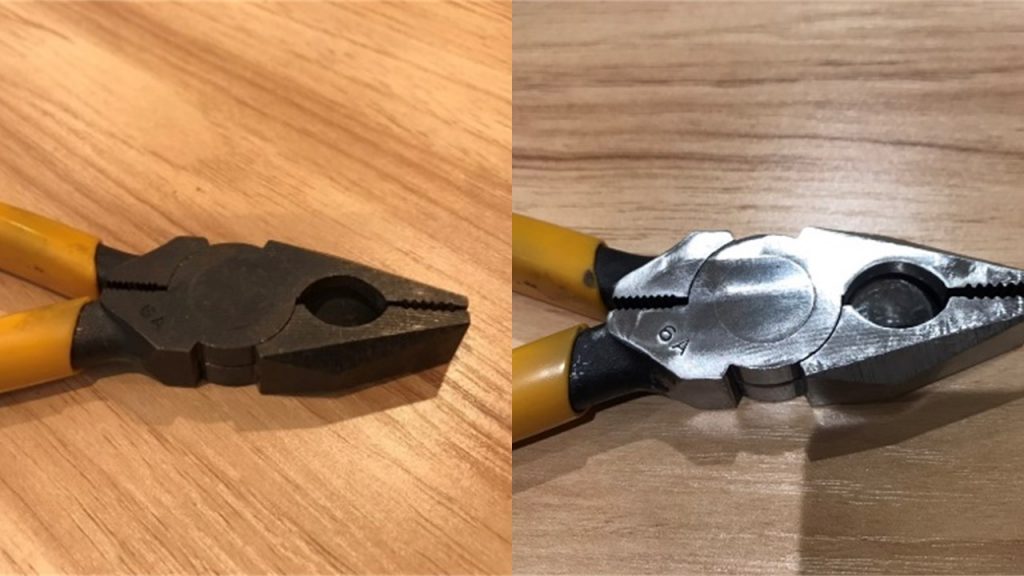
Polishing is a process to finish the workpiece surfaces smooth.
It is to eliminate unevenness from the workpiece surfaces, remove burrs and make the surfaces glossy.
To polish the workpiece surfaces, use a polishing tool such as an abrasive stone.
For example, when you do a DIY project using wood, you usually polish the cut surfaces.
The wood surfaces cut by a saw have small splinters, and if you touch the splinters carelessly,
you could be injured.
That is why it is important to polish the cut surfaces with sandpaper to make the surfaces smooth.
The polished surfaces have no splinters, and they look nice and smooth.
When you paint, it is better when the surfaces are polished because you can paint evenly.
In production sites, the polishing process is implemented as the last process of production
to improve the quality and the look of the workpieces.
The followings are different methods of polishing:
2-1. Abrasive stone polishing
2-2. Polishing with abrasive cloth and paper
2-3. Lapping
2-4. Abrasive tape polishing
2-5. Buffing
2-6. Barrel polishing
2-7. Electropolishing
The followings are the differences in these polishing methods:
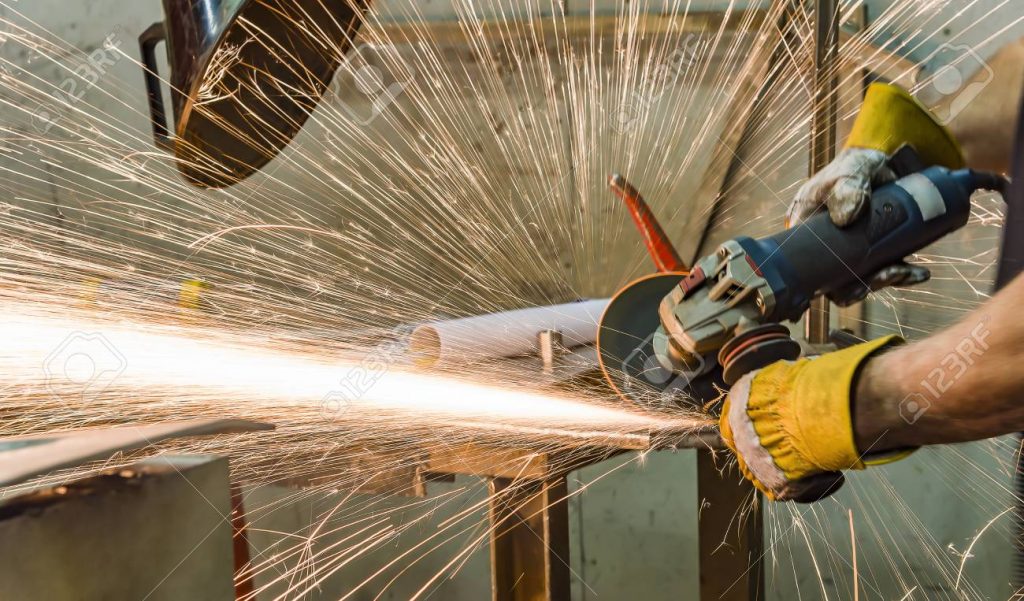
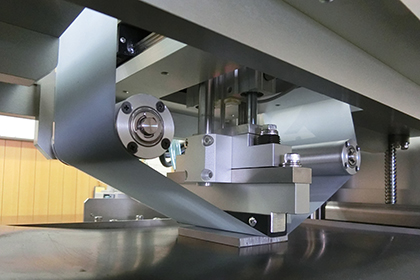
Abrasive stone polishing is to polish the workpiece surface by touching the surface
with an abrasive stone spinning at high speed.
It can be pressing the abrasive stone against the fixed workpiece or pressing the workpiece
against the fixed abrasive stone.
Even when the abrasive grains are worn off from the abrasive stone,
the grains underneath appear on the surface.
Therefore, you can continue polishing the workpiece without aborting the polishing process.
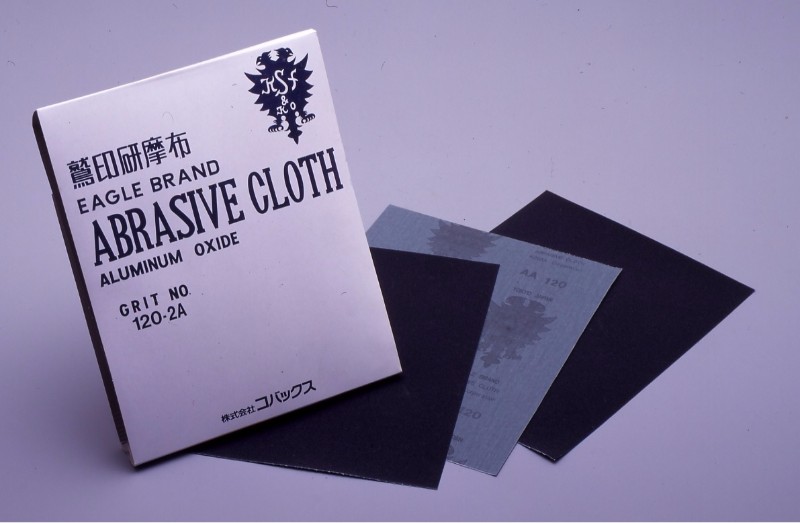
(Image from Kovax Corporation website “Eagle Brand Abrasive Paper”: https://www.kovax.com/products/subcategory01/item_92)
Polishing with abrasive cloth and paper is to polish the workpiece surfaces with sandpaper.
Sandpaper has abrasive grains on the surface of a sheet of paper,
and by rubbing the sandpaper against the workpiece, you can polish the workpiece surface.
Sandpaper has different abrasiveness, and the abrasiveness is indicated
by the numbers based on the grain size.
You can select the abrasiveness depending on the purpose of use.
A smaller grit number means coarse, and a bigger grit number means finer sandpaper.
At some production sites, they use a cloth belt to polish the workpieces
by automatically rotating the belt and pressing the workpieces against the belt.
With this method, you can remove burrs from parts and tools as well as polishing products.
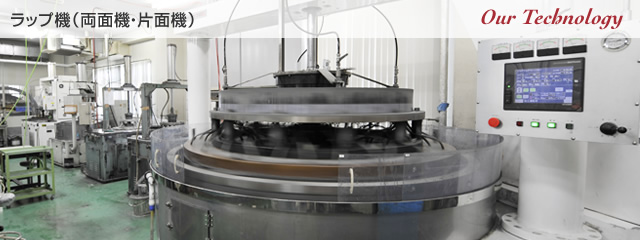
(Image from Fuji-seiko website “About lapping machines (double sided, single sided)”: http://www.fj-seiko.co.jp/technology/seiatsu/lap.html)
Lapping is to fix the workpiece on a plate called lap surface plate and rotate the plate to polish.
The workpiece surface is polished by being rubbed with the polishing agent that contains abrasive grains.
There are 2 styles of lapping: wet lapping and dry lapping.
(Image from Sankyo Rigaku Co., Ltd. website “Abrasive tape polishing machine”: https://www.sankyo-blast.com/product/tape/)
Abrasive tape polishing is to polish the workpiece by using a tape (film) with abrasive grains on it.
You can polish by rotating the workpiece and pressing it against the tape.
There are various types and widths of tapes available,
and you can change the tapes depending on the workpieces to polish.
Since you always use a new tape to polish, you can expect an excellent finish.
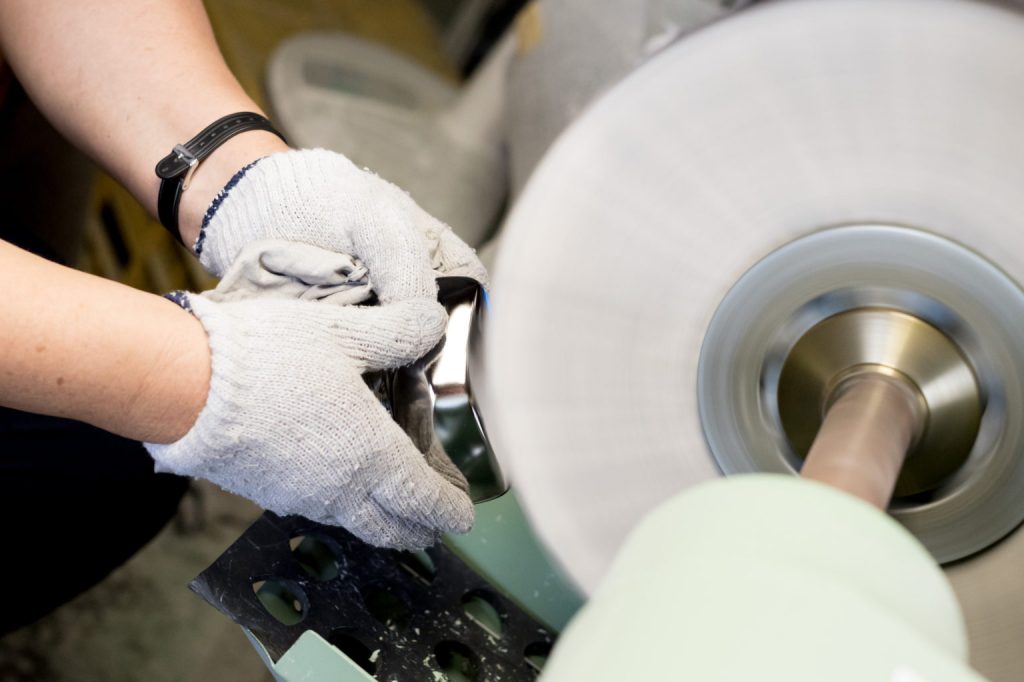
(Image from Sanwa Mekki website “Tips for buffing”: https://sanwamekki.com/info/column/column_polishing/about-some-buffing-tips/)
Buffing is to polish the workpieces by pressing them against rotating soft material
such as felt and cloth that has polishing agent.
Basically, this method is used as the finish of polishing process.
The definition of buffing may differ depending on the production sites.
However, it is the same for all production sites that buffing is for the mirror finish and glossing.
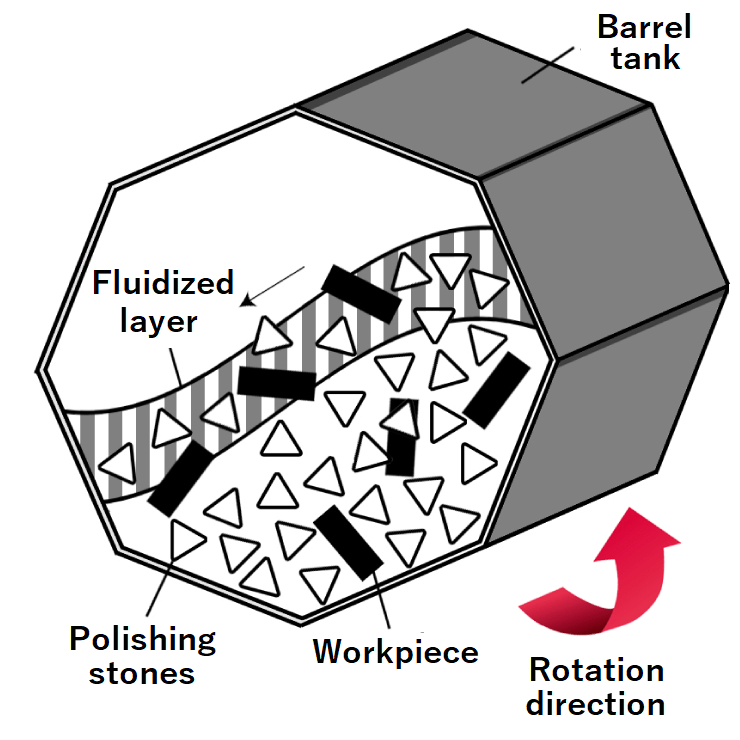
(Image from Tipton Corp. website “About barrel polishing”: https://www.tipton.co.jp/barrel/barrel-guide/kind/)
Barrel polishing is to add polishing agent (compound), water, polishing stones (media) and workpieces
in a large tank and rotate and shake the tank to polish the workpiece surfaces.
This method is suitable for both glossing and deburring.
By the manual work of polishing, the quality tends to vary depending on the workers’ skills.
However, by this method, a certain level of pressure is applied,
and the workpieces will be finished uniformly without unevenness.
Since you can add a large number of workpieces in a barrel tank at one time,
this method is suitable for mass production.
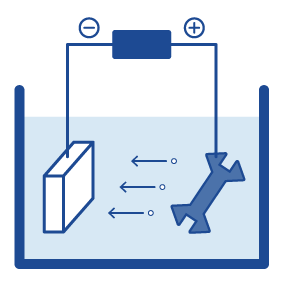
In electropolishing, a direct electric current is applied to make the workpiece surface smooth.
Electropolishing liquid is used as the media to conduct electricity.
The advantage of electropolishing is that it is applicable to slight unevenness and small surfaces that are hard to polish.
You can expect the high accuracy in the finished workpieces.
However, the cost is higher than the other polishing methods, and it is not applicable to some metal materials.
The steps in the polishing process may vary depending on the material to be processed,
the accuracy of the finished workpiece, and the requirement from the client.
However, in general, the followings are the steps taken in the polishing process:
The followings are the detailed explanation of each step.
First, you need to eliminate unevenness and foreign objects from the workpiece surface.
This step is to improve the accuracy of the finished workpiece.
In this step, use an abrasive stone with a lower number of grain size (coarse) to largely shave off the surface of the workpiece.
If you use a fine abrasive stone from the first place, the gaps between abrasive grains will be clogged, and become blunt.
When machining a product with a large number of lots, the surface roughness is not the same
for each workpiece of the same product.
Therefore, the foundation step is needed to roughly polish the workpiece surfaces
with an abrasive stone with a low number of grain size
so that the surface roughness will be almost the same for all the workpieces.
This step is simply a preparation for the next steps.
The accuracy of the workpiece does not need to be close to how it is specified on the design drawing at this stage.
With the foundation process, you can remove the unevenness and the foreign objects from the workpiece surface
to a certain extent, however, the surface remains rough.
Therefore, in the leveling process, use an abrasive stone with a higher number of grain size
than the one used in the foundation process to polish the surface to improve the accuracy.
This step is to polish the workpiece surface to make it glossy.
With the leveling process, most of the unevenness and the foreign objects are eliminated from the workpiece surface.
Still, you may notice the roughness remained on the surface.
Therefore, use an abrasive stone with a higher number of grain size to polish the workpiece surface to make it glossy.
This is the last step of the polishing process.
As the word “mirror” suggests, this step is to polish the surface to make it shiny like a mirror.
In this step, you need to use an abrasive stone with the grain size greater than the one used in glossing.
Since the surface is almost finished in the previous step of glossing, there is no major work required in this step.
Depending on the requirement from the delivery destiny (client),
you may need to do buffing by using polishing agent instead of using an abrasive stone as the last step.
[Column] Need to think of improvement always for different levels of quality depending on the requirements from the clients
It is not rare to ship the same product to multiple clients.
When you need to ship the same product to multiple clients, the product needs to meet the quality requirement
from each client.As an example, imagine that you need to deliver the product called “A-1“ to 3 different companies as below:
Product delivery destination Company X Company Y Company Z Product name A-1-X A-1-Y A-1-Z Number of orders per month 400 300 (Expected to be increased in the future) 1500 Required quality level Extremely high High Average Improvement in mirror polishing Needed Not needed Not needed Unit price (JPY) 1,500 1,000 1,000 Polishing 5 times 4 times 4 times Notes Extremely high level of quality is required. Need to add steps in the polishing process, resulting in the higher unit price. High level of quality is required but contracted with the standard process since the number of orders is small. The orders to be increased in the future, so the company requested you to improve the quality level while maintaining the unit price. No problem with the standard process.
Even though it is the same product to deliver, a different quality level is required by each company.
As indicated in the table above, the quality level required by Company X is the highest.
With the standard polishing process, it is not possible to meet the requirements from Company X
such as shininess and roughness of the polished product.
For that reason, you need to modify the mirror finishing process by using an abrasive stone
with a higher number of grain size.
However, changing the polishing process results in higher unit price.On the other hand, for Company Z and Y, there is no need to change the process of mirror finishing.
Therefore, you can offer the product with a lower unit price than for Company X.
Especially Company Z, since the number of orders per month is bigger than the other companies,
you can say that it is your important client.Although the quality level required by Company Y is high,
it is possible to contract with them with the current polishing process
because the number of orders per month from Company Y is small.
The demand for the product is expected to increase in the future,
so Company Y requested your company to improve the quality level of the product.However, if you need to increase the number of steps in polishing just like you do for Company X,
you will need to raise the unit price.
Raised unit price means your competitor can win the contract over your company.Sure, Company Y wants to maintain the current unit price in order to increase their sales.
For that reason, sometimes you need to accept an unreasonable request of improving the quality level
while not increasing the number of steps in polishing.In order to make a profit while meeting the requirements from the client,
it is necessary for the manufacturing technology side and the production site to work together
to come up with the best possible processing condition
and think of improvement at all times such as the polishing method and the choice of abrasive stone.
Quite often, “grinding” is confused with polishing.
Grinding and polishing can be done in the same production line at some production sites
and the word grinding can be used as the same meaning as the word polishing.
However, to be precise, grinding and polishing are regarded as different processes.
The followings are the machining processes other than polishing:
The followings are the detailed explanation of each process.
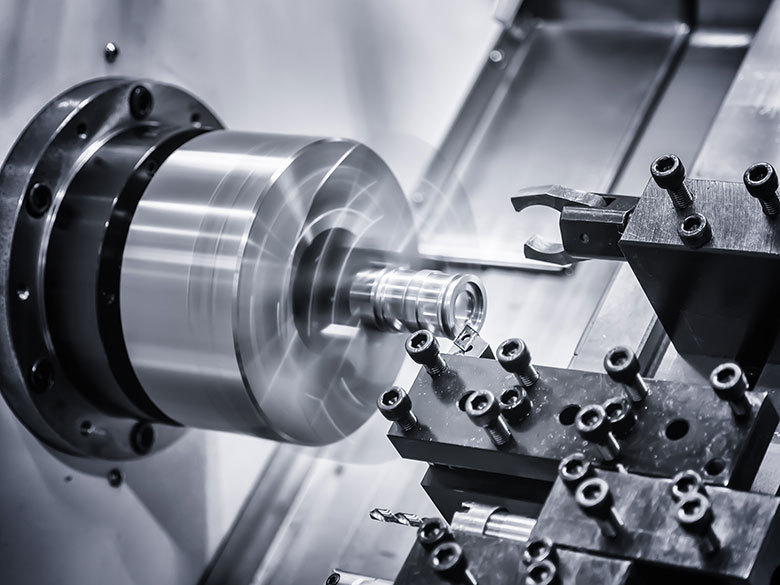
The cutting process includes shaving, cutting out and drilling.
Rather than finishing the workpiece, it is to cut out the workpiece to make it into the designed shape.
It is usually the first process of production followed by grinding and polishing at most factories.
For cutting, you can use a machine such as “lathe”, “milling machine” and “drilling machine”.
It is to cut the outside and inside of the workpiece and drill holes to make the workpiece into the intended shape.
It is applicable for various purposes and is very versatile.
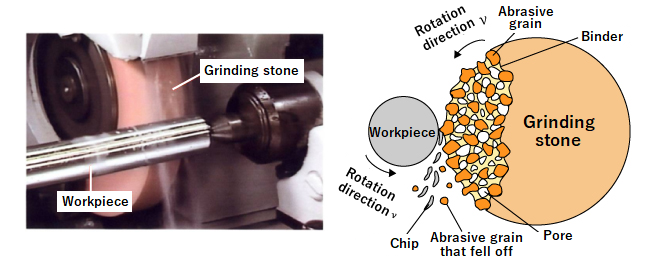
Image from “The basics of grinding” by Kuniaki Umino, The Nikkan Kogyo Shimbun, Ltd.
Grinding is to shave the metal material with an abrasive stone spinning at high speed.
It is usually done after the cutting process.
For grinding, you can use a machine such as “flat surface grinding machine”, “cylindrical grinding machine”
and “double-sided grinding machine”.
It is not possible to change the shape of the workpiece drastically by grinding.
However, it is possible to improve the finish of the workpiece surfaces and make the surfaces smooth.
You can also use the abrasive stones with the different grain sizes on the same equipment
to do rough grinding and finish grinding.
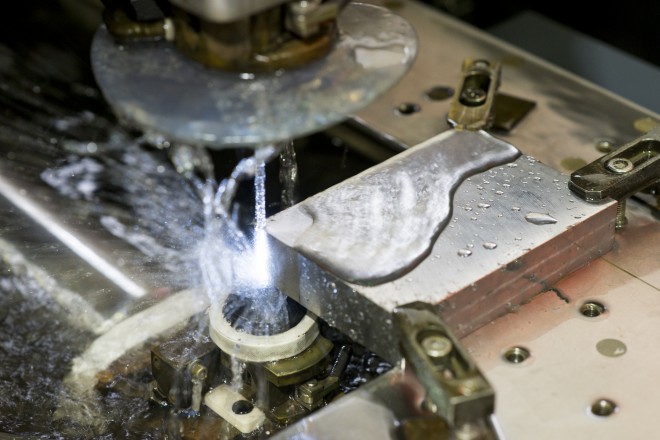
Electric discharge machining is to use the discharged electricity as the energy to process workpieces.
You can use this method when cutting and grinding are not applicable.
It is suitable for machining hard materials such as cutting the workpiece with a wire with the electric current applied.
An abrasive stone used for polishing consists of 3 components below:
| Abrasive grains | Grains to “shave”, “cut” and “polish” the workpieces. Basically, the abrasive grains are designed to be harder than the material to process. |
| Binder | It is to combine, maintain and adhere abrasive grains. It is also called “bond”. |
| Pores | Gaps in the abrasive stone. Pores are for storing chips as well as releasing the heat generated during the polishing process. |
There are abrasive stones without pores available as well as the ones with pores.
The performance of abrasive stones differs depending on the 5 factors below:
You need to change the abrasive stones to use depending on the material, shape and accuracy required
of the workpiece to polish.
The followings are the detailed explanations of the factors.
There are 2 types of abrasive stones mainly used at production sites:
Alumina type (A/WA abrasive stones)
Ideal for iron and metals.
Silicon carbide type (GC abrasive stones)
Ideal for nonferrous and nonmetallic materials such as aluminum and copper
Abrasive grains made of diamond and ceramic materials can be used to polish harder materials.
The size of the abrasive grain.
An abrasive stone with a smaller number of grains size is coarser than the ones with bigger numbers.
When you want to know the approximate size of the abrasive grain on an abrasive stone in micron (μm),
you can calculate by dividing 15000 by the grain size (15000/grain size).
For example, for an abrasive stone with the grain size 80,
you can calculate the approximate size of abrasive grain in micron as 15000/80, which is 187.5,
it means the size of the abrasive grain is about 187μm.
When you want to achieve a high accuracy, you need to use an abrasive stone with a higher number of grain size.
On the other hand, when you want to roughly shave off the surface without aiming for a high accuracy,
then you need to use an abrasive stone with a smaller number of grain size.
Degree of coupling indicates how hard the abrasive stone is.
To be more exact, it shows the ability to maintain abrasive grains and binder.
Degree of coupling is described in alphabetical letters from A to Z.
An abrasive stone with the degree of coupling closer to A means softer,
and the one closer to Z means harder.
In general, abrasive stones with greater degrees of coupling are used for soft workpieces,
and the ones with smaller degrees of coupling are used for hard workpieces.
As for the grinding stone, it hardens with the high peripheral speed,
so it is equivalent to the abrasive stone with a greater degree of coupling.
Structure number indicates the content ratio of abrasive grains in the abrasive stone.
It shows the number of abrasive grains contained in an abrasive stone,
and there are numbers from 0 to 14.
You can find the abrasive grain content ratio of each structure number in the table below:
| Structure number | 0 | 1 | 2 | 3 | 4 | 5 | 6 | 7 | 8 |
| Abrasive grain ratio (%) | 62 | 60 | 58 | 56 | 54 | 52 | 50 | 48 | 46 |
An abrasive stone with a larger structure number has lower abrasive grain ratio,
and the gap between each grain is wider.
Binder has the role of binding abrasive grains and maintaining them.
It is also called “bond” since it adheres abrasive grains and prevents them from falling apart.
There are 2 major types of binders available:
Resinoid (B)
Applicable to high rotational and peripheral speed.
It is used for rough grinding with a large margin of grinding.
Vitrified (V)
Excellent in maintaining the shape. It is used for finish grinding and polishing.
In production, the grinding process is almost always followed by the polishing process.
In fact, a lot of production sites regard polishing and grinding as a set of process.
In this chapter, we will explain why it is important to polish the workpiece after grinding.
Sometimes it is difficult to achieve the surface roughness of the workpiece required at the production site.
If you want to achieve the surface roughness of the workpiece by grinding,
you will need to shorten the dressing lead (distance to move by one rotation of grinding stone)
and use a finer grinding stone.
However, if you use a finer grinding stone, it is more likely to be clogged.
When the grinding stone is clogged, it remains dull until the next dressing,
the workpiece dimension varies, and in the worst case, grinding burn may occur.
Therefore, it is important to polish the workpiece after grinding.
You can improve the surface roughness without having to worry about grinding burn.
If a grinding machine is used mainly at the production site,
polishing can improve the circularity (accuracy in a circular shape) of the workpiece
as well as improving the surface roughness.
When you rotate the workpiece at high speed in grinding, you cannot prevent the workpiece from vibrating.
Vibration can lower the circularity of cylindrical objects.
Therefore, you need to polish the workpiece to reduce unevenness to improve the circularity.
By polishing the workpiece, it is possible to remove burrs and chamfer
as well as improving the workpiece accuracy and performing the mirror finishing.
The followings are the possible problems that can be caused by burrs.
If you use conveying equipment such as a conveyor and a robot to supply the workpiece,
equipment may act unexpectedly when deburring and chamfering are not done to the workpiece.
For example, when the workpiece goes onto something from something else,
such as when the workpiece goes onto conveying equipment from the conveyor,
or when you feed the workpiece through a stainless steel V-chute or an air hose,
there is always a difference in level.
If the workpiece and the tool are not chamfered or burrs are remained on the workpiece and the tool,
the workpiece can be caught when it is interfered.
If you fail to convey the workpieces properly, the workpieces can interfere with each other
and may be damaged by being hit or the cylinder, where the workpiece is sent to, may malfunction.
Especially problems in conveying workpieces in cylinders may lead to accidents by getting stuck,
therefore, it is important to take preventive measures against such problems.
In order to enable safe and smooth conveying of workpieces, deburring and chamfering are important.
By cutting and grinding, only the surfaces of the workpiece are processed.
Therefore, burrs tend to remain on a part of the workpiece not interfered by a blade and abrasive stone.
Burrs remained on the workpiece can affect the processes that follow,
and they can also affect assembling of parts.
Not to lower the quality of the workpiece, deburring and chamfering are important.
Burrs formed on a hidden part of the workpiece can cause a major damage to equipment.
For example, if the workpieces are tapered like a conical roller,
you need to place them so that they are facing the same direction before machining.
The stability of the workpiece varies depending on the length of the taper,
and if there are burrs on the conveying part of equipment,
the workpieces can get caught on burrs and turn to face the wrong way.
When the workpiece is moved to face an unexpected direction, it can cause a heavy burden to equipment.
Burrs remained on a single part of the workpiece can cause an unexpected damage.
In order to protect equipment from such damages, deburring and chamfering are important.
You can find the detailed explanation of deburring from the link below:
- About deburring
https://www.xebec-tech.com/en/study/about_deburring/
Polishing is usually the final process in manufacturing,
and it is to improve the accuracy of the workpieces and make the workpieces looking beautiful.
To maintain the quality of the workpieces to be shipped from the factories,
polishing is an important process in manufacturing.
Polishing is also for deburring and chamfering of preparation parts and conveying equipment.
It is important to remove burrs and chamfer by polishing, otherwise, it may cause unexpected problems.
To implement the polishing process, it may take some time to select the type of abrasive stone,
the polishing method, and the processing conditions that suit you best.
However, improving the polishing process may help differentiating your company from the competitors.
